You lie in bed waiting for sleep, but the room refuses to darken. Outside, a municipal high-efficiency LED fixture hums silently on the corner, casting a harsh, pale blue beam straight through the slats of your blinds. It cuts across your ceiling, sharp and invasive, turning the quiet sanctuary of your bedroom into an illuminated stage.
You close your eyes, yet your eyelids register the glare. Your brain remains subtly vigilant because the optic nerve detects even fractional lux shifts through thin skin. We are told the only answer is buying heavy, three-layer thermal blackout drapery, installing custom double-rod tracks, or hiring professionals to drill brackets into drywall you might not even own.
The real culprit is not thin fabric; it is peripheral bleed. Standard curtains hang inches off the drywall, allowing a halo of artificial streetlight to wash the ceiling and baseboards. True darkness does not come from expensive velvet; it comes from a flush perimeter seal. The most effective tool for total light extinction is sitting right now in your recycling bin.
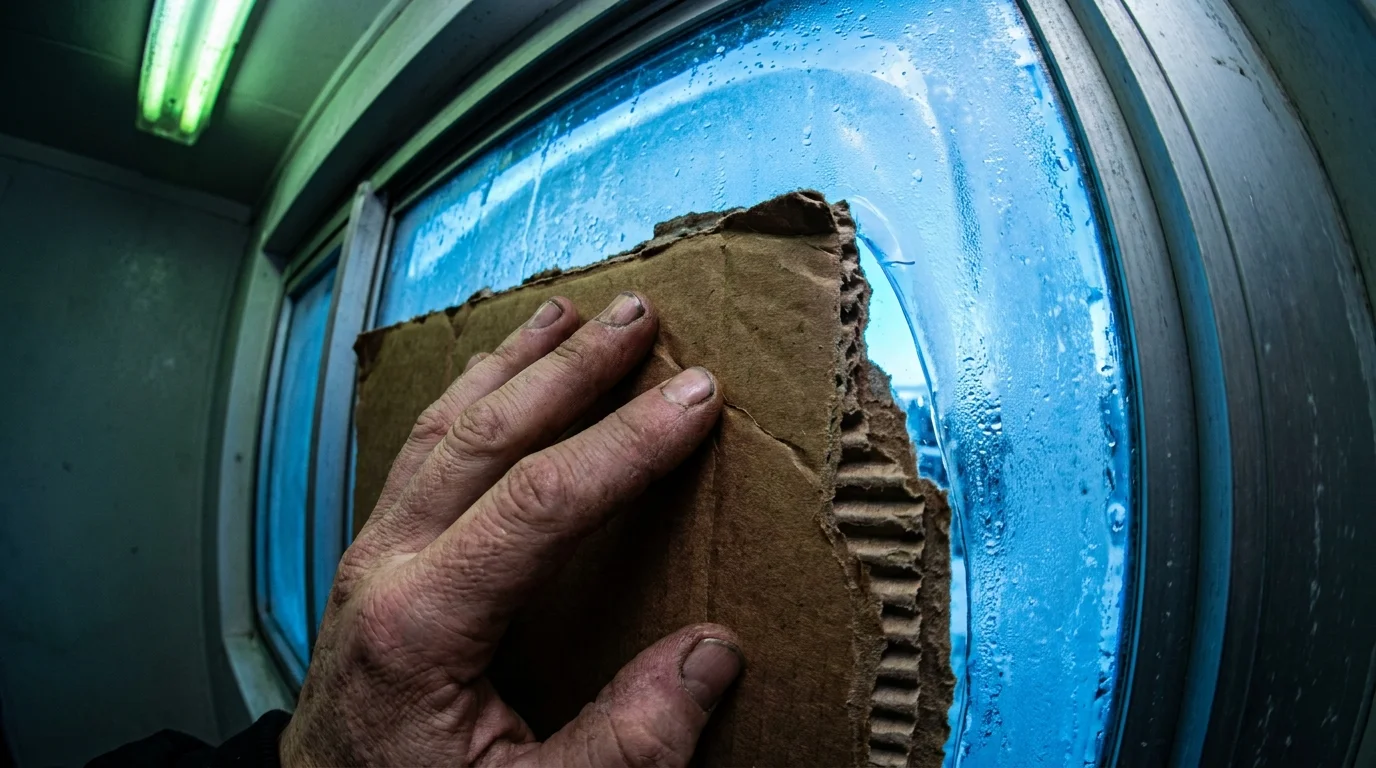
When you feel the rough corrugated brown cardboard pressed tight against chilly window glass, you realize the simplicity of the physics. A dense, multi-ply paper barrier, cut true to your window jamb, stops every stray lumen at the glass line before it ever enters your living space.
The Light Leak Fallacy: Why Curtains Always Fail the Margin
Curtains act like sails suspended over an open frame. Air currents from your heating register nudge the hem, while the mounting brackets create an unavoidable two-inch gap at the top. Light behaves like water: given a microscopic path around an obstacle, it floods the room by bouncing off white walls and polished floors.
Photons bounce with ruthless efficiency off smooth surfaces. When a 4,000-Kelvin streetlamp beam hits your ceiling, it scatters ambient glare downward onto your pillow. This scattered glow suppresses melatonin production, nudging your nervous system into a shallow, restless state of half-sleep.
Cardboard window light blockers operate on a fundamentally different mechanical principle: the friction seal. Instead of hanging in front of the window recess, a scored piece of corrugated board sits directly inside the window jamb. It creates an opaque, light-tight baffle that absorbs incoming beams immediately at the perimeter.
- Grandmother’s warm onion poultices resurface to break up stubborn deep chest mucus overnight
- Brewed whole clove gargles block stubborn morning throat scratchiness and numb swollen tonsils
- Raw ginger root slivers spark explosive morning mental clarity without shaky coffee jitters
- Calcium carbonate supplement tablets deposit chalky undissolved residue sparking stubborn morning belly bloat
- Ice-cold green juice tonics trigger sudden stomach cramps by freezing delicate digestive lining
By treating the window reveal as a mechanical channel rather than an aesthetic frame, you turn an awkward architectural opening into an absolute light trap without spending a single dollar.
The Shift Worker’s Secret from the Industrial Corridor
Marcus Vance, a 42-year-old freight dispatcher in Chicago, spent years wrestling with erratic sleep schedules. His bedroom faced a brightly lit railyard where sodium vapor lights were swapped for piercing industrial LEDs. After spending nearly three hundred dollars on custom blackout curtains, he still woke up every ninety minutes with dull headaches and strained eyes from the peripheral light creeping over the curtain rod.
Frustrated after a grueling overnight shift, Marcus grabbed two discarded shipping boxes from a recent appliance delivery. He measured the interior depth of his window frame, sliced the corrugation slightly wider than the opening, and pressed the panels directly against the interior glass stops.
“The room went pitch black instantly,” Marcus noted when explaining his setup. “Not dim, not shadowed, but void-level dark. For the first time in five years, my sleep app showed zero micro-arousals between noon and five in the afternoon. The temperature by the glass dropped, the street noise dropped, and I didn’t have to drill a single hole in the landlord’s trim.”
Three Ways to Build Your Custom Light Baffle
Not every window casing is built the same way. Matching your cardboard barrier to your specific sash and sill configuration ensures you get complete light blocking without damaging paint or trapping unwanted moisture.
For the Deep Drywall Reveal
Modern apartment buildings often feature deep, drywall-wrapped window jambs without wooden trim. For these windows, cut a single, clean sheet of dual-wall cardboard exactly one-eighth of an inch wider and taller than the inner opening. The natural spring-action of the internal corrugated flutes allows you to gently flex the board into place, where it holds itself securely through outward tension against the side walls.
For Shallow Wooden Casings with Double-Hung Sashes
Older homes frequently have shallow wooden sills where interior depth is limited to less than an inch. Build a two-piece overlapping shutter by slicing two separate panels that meet in the center. Score a one-inch flap on the outer vertical edge of each panel to create a flexible gasket that tucks cleanly into the window track, then secure the center seam with a removable strip of painter’s tape.
For Horizontal Sliding Windows
Slider windows present unique challenges because the locking mechanism often protrudes beyond the glass surface. Measure the recessed side first, then cut a custom notch directly into the cardboard backing to accommodate the latch. This keeps the panel completely flush against the glass and stops upward light bounce along the bottom rail.
The Zero-Cost Installation Guide
Creating a flawless room baffle requires precision over force. Take ten quiet minutes in the afternoon to construct your insert, ensuring you test the fit while natural sunlight is still available to reveal any micro-gaps along the frame.
- Measure the inner glass stop: Use a rigid metal tape measure to record the height and width of the inner frame at three distinct points: top, middle, and bottom. Always use the narrowest measurement to avoid buckling the board.
- Harvest rigid, unbent corrugated stock: Select shipping boxes with intact flutes. Avoid water-damaged or heavily creased cardboard, as collapsed internal channels lose their structural spring tension.
- Cut with a fresh utility blade: Place the cardboard on a flat cutting mat or scrap wood. Use a metal straightedge and slice through the top liner first, followed by a second pass through the corrugation for a crisp, burr-free edge.
- Add a fabric pull-tab: Tape a three-inch loop of ribbon or duct tape to the lower corner facing your room. This allows you to effortlessly pull the panel out each morning without picking at the edges or scraping your window trim.
- Check for thermal moisture: During freezing weather, leave a quarter-inch gap at the top during daytime hours or remove the panel upon waking to allow natural room airflow to clear any condensation from the glass.
The Tactical Toolkit:
• Material: Double-wall corrugated kraft board (Grade 200# or 275#).
• Tool: Utility knife with a brand-new, snapped blade.
• Edge Guide: 24-inch to 48-inch rigid aluminum ruler.
• Sealant: Standard one-inch blue painter’s tape for seam joining (never duct tape on trim).
The Deeper Rhythm of Uncompromised Rest
Reclaiming control over your bedroom environment is more than an exercise in budget problem-solving; it is an intentional boundary set between your nervous system and the 24-hour illuminated city. When you remove artificial light leaks, your body shifts naturally through deep slow-wave and REM sleep phases without silent interruptions from external municipal fixtures.
A pitch-black bedroom restores natural recovery by allowing core body temperature and heart rate to fall without visual micro-stimuli. You wake up with clearer eyes, balanced morning cortisol, and an uncluttered mind that feels genuinely restored.
Sometimes the most profound upgrades to daily health do not arrive in high-end packages with expensive price tags. They come from looking at everyday materials with practical ingenuity, taking control of your personal space, and crafting the exact conditions your body needs to thrive.
“True sleep hygiene begins at the glass, not the fabric store; when you eliminate perimeter light leaks, the nervous system finally stops scanning the room.”
| Key Point | Detail | Added Value for the Reader |
|---|---|---|
| Perimeter Light Gasket | Cardboard cut 1/8-inch oversized creates inward tension against the window frame. | Completely stops light leaks at the edges, outperforming loose curtains. |
| Zero-Cost Material | Uses clean, repurposed shipping boxes and everyday household utility blades. | Eliminates the need for expensive drapery, mounting hardware, or wall damage. |
| Thermal & Acoustic Buffer | Corrugated channels trap dead air directly against cold glass panes. | Reduces draftiness and muffles quiet street sounds alongside blocking light. |
Frequently Asked Questions
Will placing cardboard against the window cause moisture damage or mold?
In very cold climates, interior moisture can condense against cold glass. To prevent this, simply pull the cardboard down in the morning using your pull-tab to let natural daytime room air circulate and evaporate any overnight moisture.Can I paint the cardboard to make it look better from the inside?
Yes. You can roll a coat of matte black or neutral latex paint onto the room-facing side, or wrap it in dark craft paper. Just ensure the paint cures fully for 48 hours outside the bedroom to avoid breathing in fresh paint fumes while you sleep.Does cardboard block outside noise as well as light?
While not a dedicated soundproofing barrier, the multi-layered flutes of corrugated board trap dead air, which noticeably dulls high-frequency street noise like distant traffic tire hum and light breezes.How do I store the panels during the daytime?
Because they are thin and lightweight, you can easily slide them under the bed frame, slip them behind a dresser, or tuck them between your wardrobe and the wall in seconds.Is there a fire risk with using cardboard against the window?
Standard streetlights and ambient sunlight do not create enough heat to ignite paper products. However, make sure your cardboard panel stays at least twelve inches away from portable space heaters or active baseboard heating units.